misskey是由日本开发者syuilo开发的一款去中心化微博客社交平台,支持Activity Pub协议因此可以与mastodon等平台很好互联,同时其去中心化的特征使个人信息可以得到较好的保障。
因此我们今天就在自己的vps搭建misskey服务(毕竟数据放在自己这里才是最为放心的嘛)
准备
- 正常连接网络的环境
- 一台可以正常连入国际网络的vps(否则会造成无法与其他节点互联)
- 一个已经完成解析的域名
- 一点耐心
开始
我们主要使用docker进行搭建,因此现在vps上安装docker
-
我们先在合适的地方创建配置文件,我就选择放在了home文件夹里面
mkdir -p /home/misskey && cd /home/misskey -
复制官方提供的docker-compose文件并进行修改:
wget https://raw.githubusercontent.com/misskey-dev/misskey/master/docker-compose_example.yml -O docker-compose.yml然后使用vim对文件进行修改即可
vim docker-compose.yml -
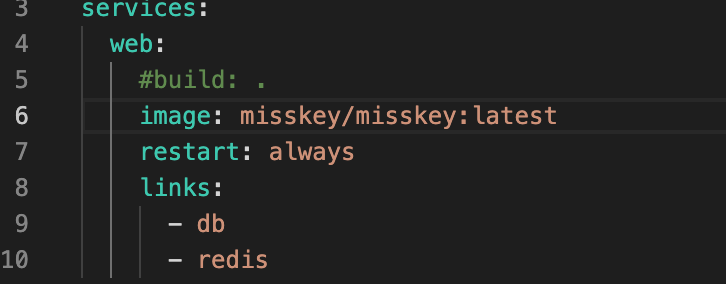
我们注释掉build,同时添加官方最新的镜像地址
image: misskey/misskey:latest同时在restart下面添加一行
user: 1000:1000设置权限如果你需要修改映射端口和存储目录,请在这里一并修改!!!很重要

-
然后我们需要对misskey配置文件进行更新
cd /home/misskeymkdir .config && cd .config我们需要分别参照官方的docker example.env 和yml文件对数据库相关信息进行修改
在目录中创建docker.env文件并把以下内容复制进去,修改为你自己的数据库信息
# db settings
POSTGRES_PASSWORD=example-misskey-pass
POSTGRES_USER=example-misskey-user
POSTGRES_DB=misskey
DATABASE_URL="postgres://${POSTGRES_USER}:${POSTGRES_PASSWORD}@db:5432/${POSTGRES_DB}"
在目录中创建default.yml文件并把以下内容复制进去,修改为你自己的数据库信息和url
注意:一旦设定好url不要再随意更改!!!
#━━━━━━━━━━━━━━━━━━━━━━━━━━━━━━━━━━━━━━━━━━━━━━━━━━━━━━━━━━━━━━━ # Misskey configuration #━━━━━━━━━━━━━━━━━━━━━━━━━━━━━━━━━━━━━━━━━━━━━━━━━━━━━━━━━━━━━━━ # ┌─────┐ #───┘ URL └───────────────────────────────────────────────────── # Final accessible URL seen by a user. url: https://example.tld/ # ONCE YOU HAVE STARTED THE INSTANCE, DO NOT CHANGE THE # URL SETTINGS AFTER THAT! # ┌───────────────────────┐ #───┘ Port and TLS settings └─────────────────────────────────── # # Misskey requires a reverse proxy to support HTTPS connections. # # +----- https://example.tld/ ------------+ # +------+ |+-------------+ +----------------+| # | User | ---> || Proxy (443) | ---> | Misskey (3000) || # +------+ |+-------------+ +----------------+| # +---------------------------------------+ # # You need to set up a reverse proxy. (e.g. nginx) # An encrypted connection with HTTPS is highly recommended # because tokens may be transferred in GET requests. # The port that your Misskey server should listen on. port: 3000 # ┌──────────────────────────┐ #───┘ PostgreSQL configuration └──────────────────────────────── db: host: db port: 5432 # Database name db: misskey # Auth user: example-misskey-user pass: example-misskey-pass # Whether disable Caching queries #disableCache: true # Extra Connection options #extra: # ssl: true dbReplications: false # You can configure any number of replicas here #dbSlaves: # - # host: # port: # db: # user: # pass: # - # host: # port: # db: # user: # pass: # ┌─────────────────────┐ #───┘ Redis configuration └───────────────────────────────────── redis: host: redis port: 6379 #family: 0 # 0=Both, 4=IPv4, 6=IPv6 #pass: example-pass #prefix: example-prefix #db: 1 #redisForPubsub: # host: redis # port: 6379 # #family: 0 # 0=Both, 4=IPv4, 6=IPv6 # #pass: example-pass # #prefix: example-prefix # #db: 1 #redisForJobQueue: # host: redis # port: 6379 # #family: 0 # 0=Both, 4=IPv4, 6=IPv6 # #pass: example-pass # #prefix: example-prefix # #db: 1 #redisForTimelines: # host: redis # port: 6379 # #family: 0 # 0=Both, 4=IPv4, 6=IPv6 # #pass: example-pass # #prefix: example-prefix # #db: 1 # ┌───────────────────────────┐ #───┘ MeiliSearch configuration └───────────────────────────── # You can set scope to local (default value) or global # (include notes from remote). #meilisearch: # host: meilisearch # port: 7700 # apiKey: '' # ssl: true # index: '' # scope: local # ┌───────────────┐ #───┘ ID generation └─────────────────────────────────────────── # You can select the ID generation method. # You don't usually need to change this setting, but you can # change it according to your preferences. # Available methods: # aid ... Short, Millisecond accuracy # aidx ... Millisecond accuracy # meid ... Similar to ObjectID, Millisecond accuracy # ulid ... Millisecond accuracy # objectid ... This is left for backward compatibility # ONCE YOU HAVE STARTED THE INSTANCE, DO NOT CHANGE THE # ID SETTINGS AFTER THAT! id: 'aidx' # ┌────────────────┐ #───┘ Error tracking └────────────────────────────────────────── # Sentry is available for error tracking. # See the Sentry documentation for more details on options. #sentryForBackend: # enableNodeProfiling: true # options: # dsn: 'https://examplePublicKey@o0.ingest.sentry.io/0' #sentryForFrontend: # options: # dsn: 'https://examplePublicKey@o0.ingest.sentry.io/0' # ┌─────────────────────┐ #───┘ Other configuration └───────────────────────────────────── # Whether disable HSTS #disableHsts: true # Number of worker processes #clusterLimit: 1 # Job concurrency per worker # deliverJobConcurrency: 128 # inboxJobConcurrency: 16 # Job rate limiter # deliverJobPerSec: 128 # inboxJobPerSec: 32 # Job attempts # deliverJobMaxAttempts: 12 # inboxJobMaxAttempts: 8 # IP address family used for outgoing request (ipv4, ipv6 or dual) #outgoingAddressFamily: ipv4 # Proxy for HTTP/HTTPS #proxy: http://127.0.0.1:3128 proxyBypassHosts: - api.deepl.com - api-free.deepl.com - www.recaptcha.net - hcaptcha.com - challenges.cloudflare.com # Proxy for SMTP/SMTPS #proxySmtp: http://127.0.0.1:3128 # use HTTP/1.1 CONNECT #proxySmtp: socks4://127.0.0.1:1080 # use SOCKS4 #proxySmtp: socks5://127.0.0.1:1080 # use SOCKS5 # Media Proxy #mediaProxy: https://example.com/proxy # Proxy remote files (default: true) proxyRemoteFiles: true # Sign to ActivityPub GET request (default: true) signToActivityPubGet: true # For security reasons, uploading attachments from the intranet is prohibited, # but exceptions can be made from the following settings. Default value is "undefined". # Read changelog to learn more (Improvements of 12.90.0 (2021/09/04)). #allowedPrivateNetworks: [ # '127.0.0.1/32' #] # Upload or download file size limits (bytes) #maxFileSize: 262144000 -
初始化数据库,设置文件目录权限
cd /home/misskeydocker compose run --rm web pnpm run initchown -R 991:991 files(这里的files是指的你前面在docker compose里面映射的宿主机目录) -
运行容器(注意端口冲突)然后正常配置反代
docker compose up -d
# 更新
docker compose down
docker compose pull
docker compose up -d
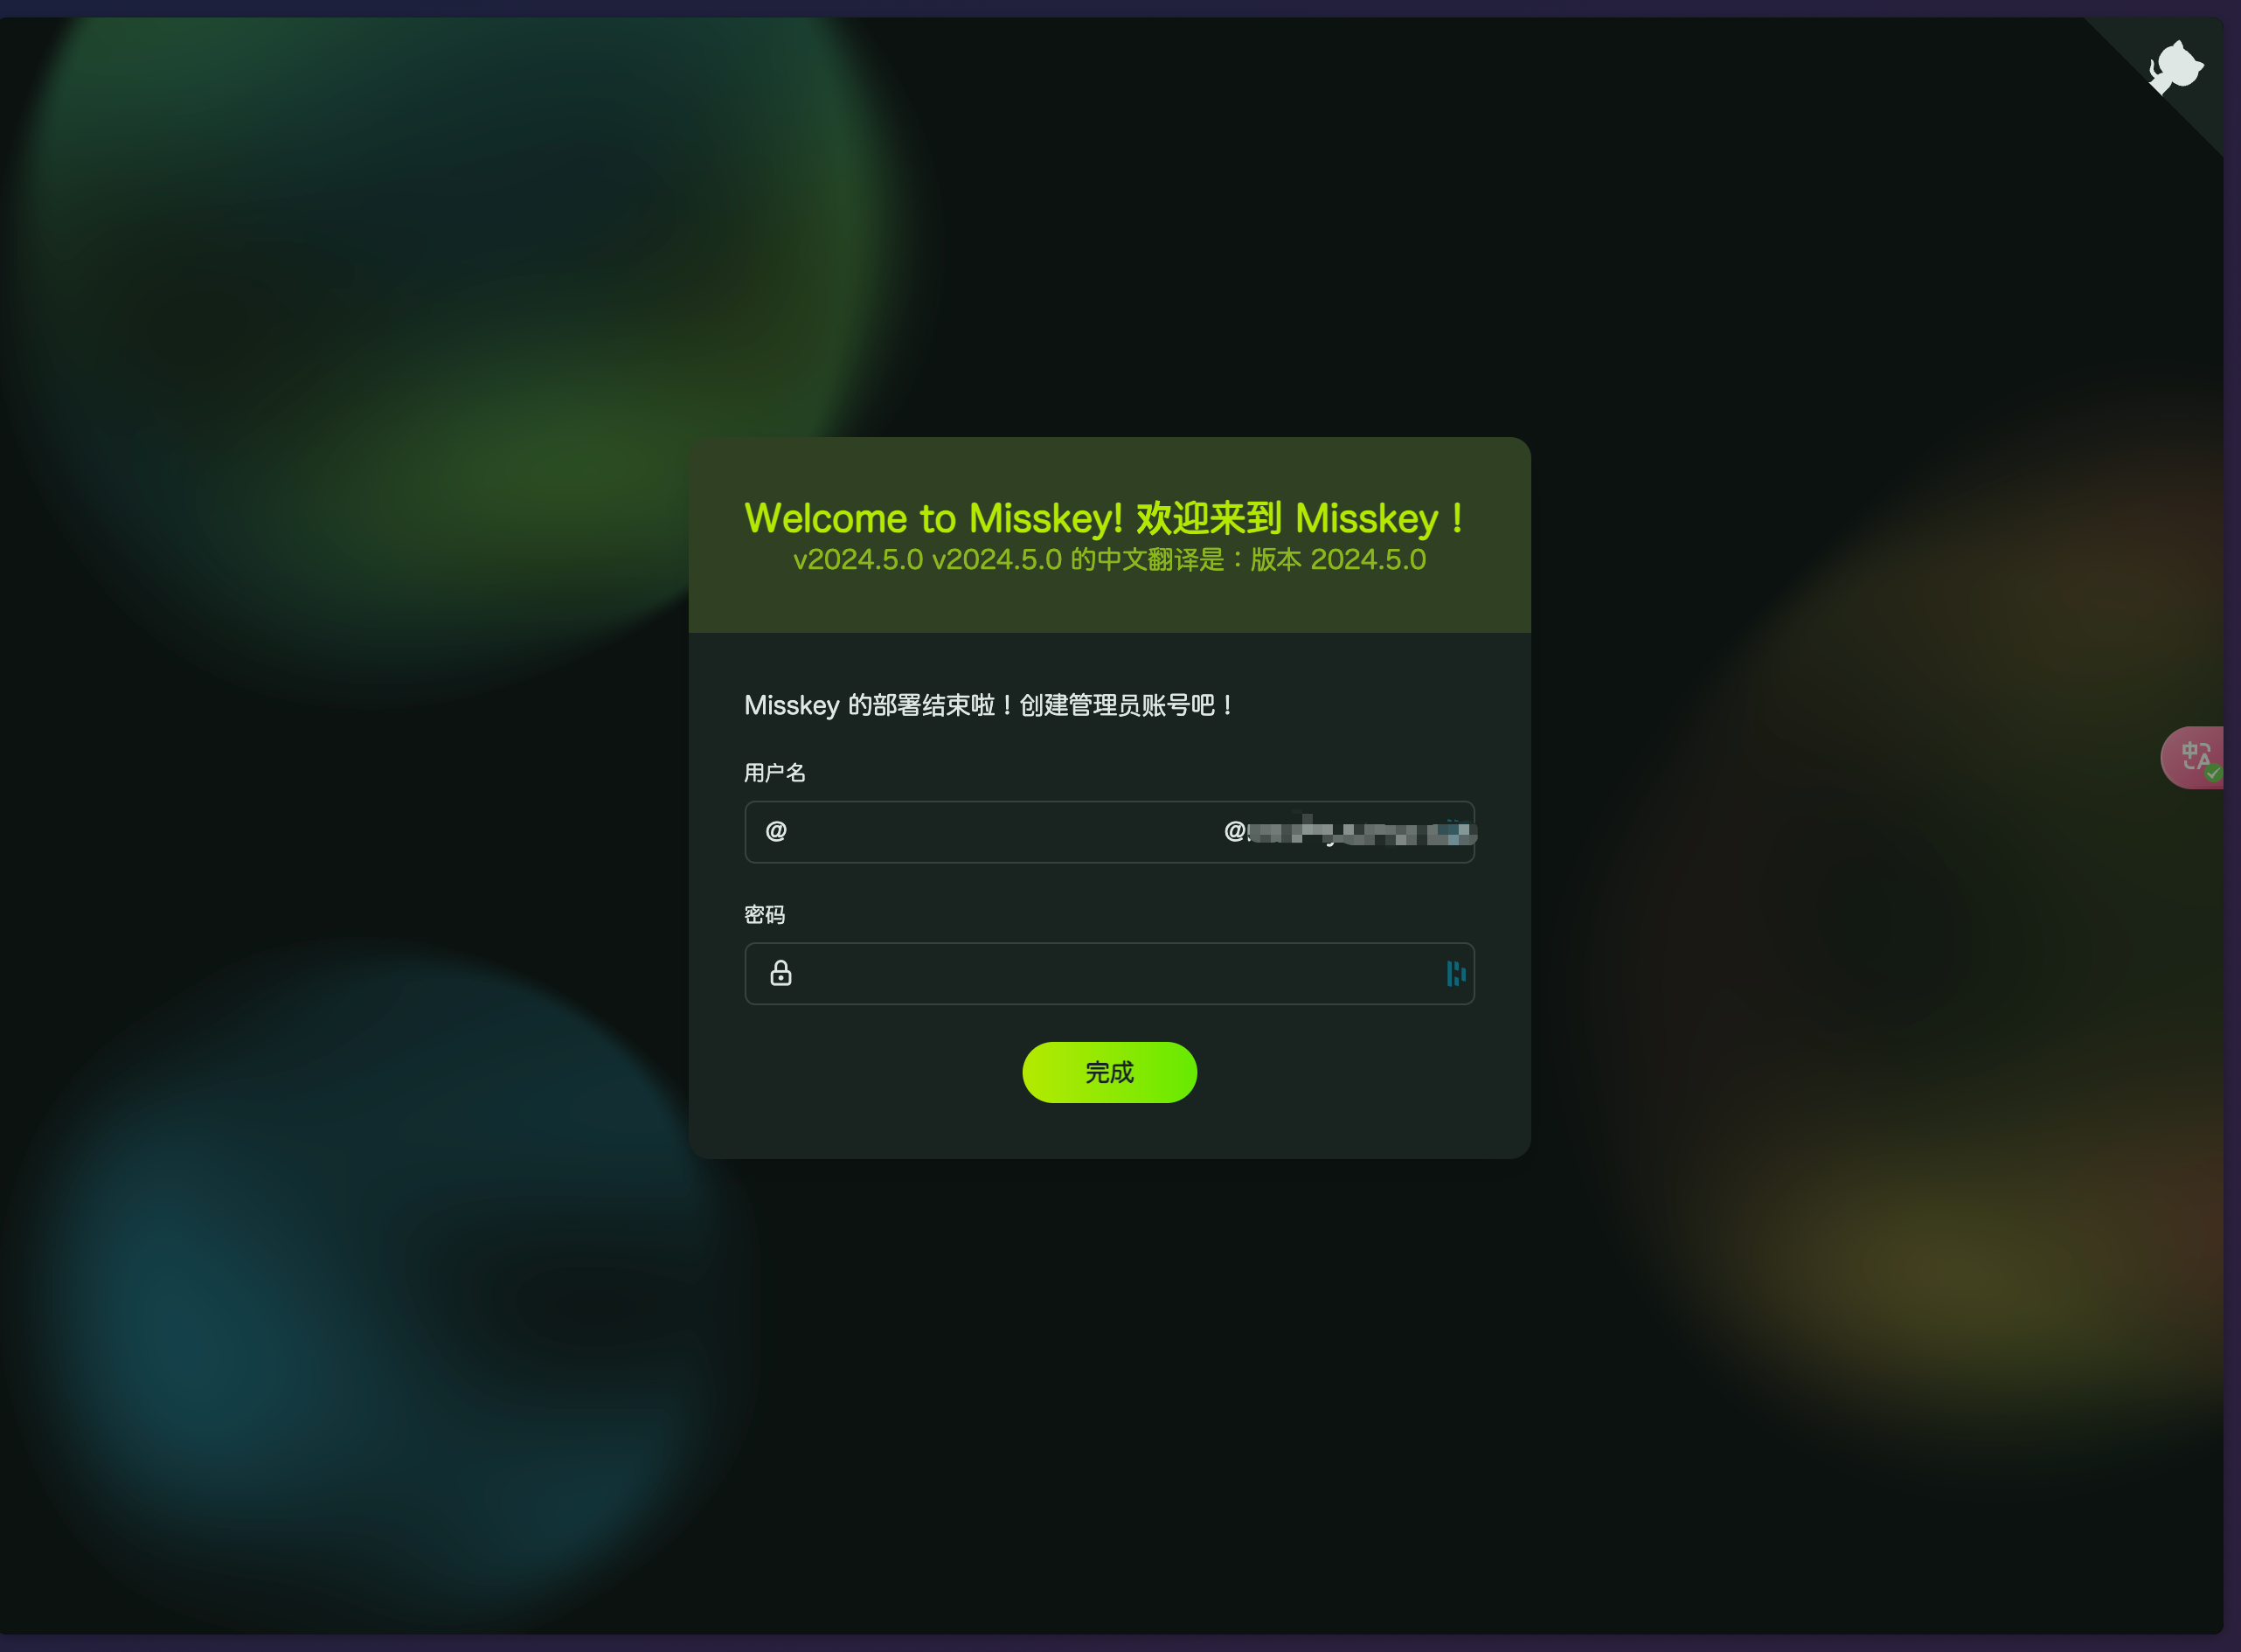
然后就成功运行啦
联合
然后我们需要添加中继拉取其他服务器上的内容,这样我们的时间线才会越来越丰富,我这里推荐两个,剩下的大家可以自己搜索加入。
在控制面板-中继中添加链接就可以了
同时还需要多聊一聊,这样高活跃度才回让实例之间peer更加容易一些,慢慢地你的timeline也会越来越充实~
firefish是基于misskey修改的另一联邦网络客户端,相当的美丽还自带搜索,有兴趣的可以去安装那个版本,安装方法与本教程说明的misskey安装方法大同小异
瞎聊
在看misskey官方文档的时候发现简体中文的翻译率相当低,因此就将用到的部分(docker安装)通过英语进行了翻译,今天看到的时候发现已经被采纳了,成就感还是满满的!以后应该也会更多地尝试这种事情!
前两天刚刚去香港玩了一趟,回头可能会写一写游记之类,但是我的开卡并不是很顺利,所以也没啥可供借鉴的经验...